Easy Gourd Birdhouse
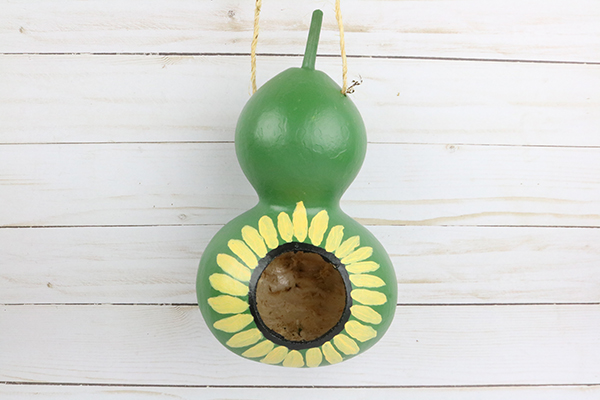
A cute little gourd bird house that is easy to make and customizable. Great DIY project to do with kids!
- Prep Time: 30 Minutes
- Total Time: 30 Minutes
- Yield: 1 Bird House
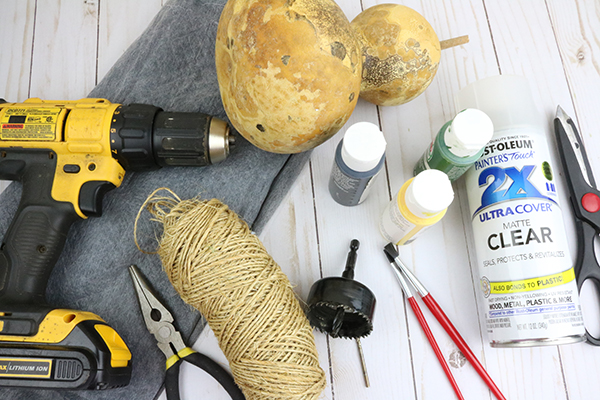
Ingredients
- 1 Pre-Dried Gourd
- Drill with Small Drill Bit
- 5 Inch Spade Bit or Hole Bit
- Sealer
- Twine or Cord
- Pliers
- Scissors
- Paint & Paint Brush (optional)
Instructions
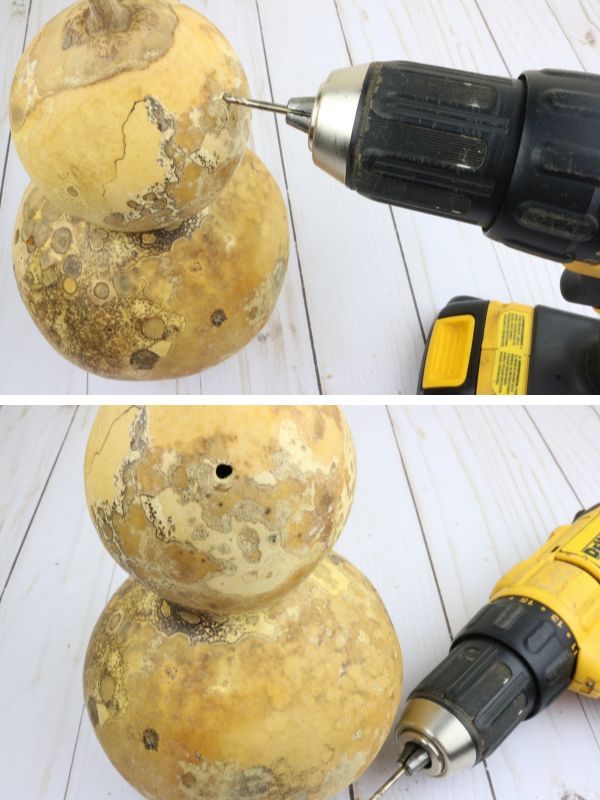
Step 1: With a drill, start by creating 4 to 5 small holes at the bottom of the gourd for drainage.

Step 2: Go to the top of the gourd. Drill a hole about 1-inch from the top.
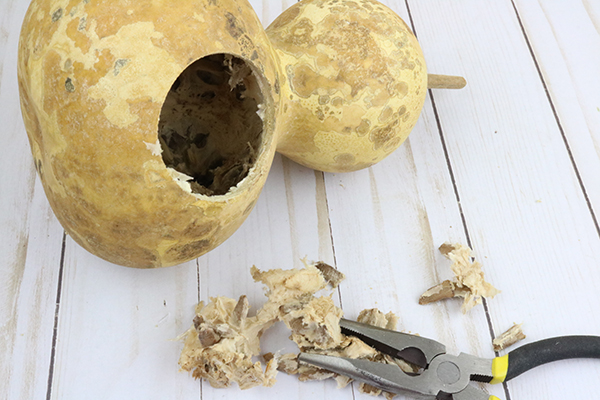
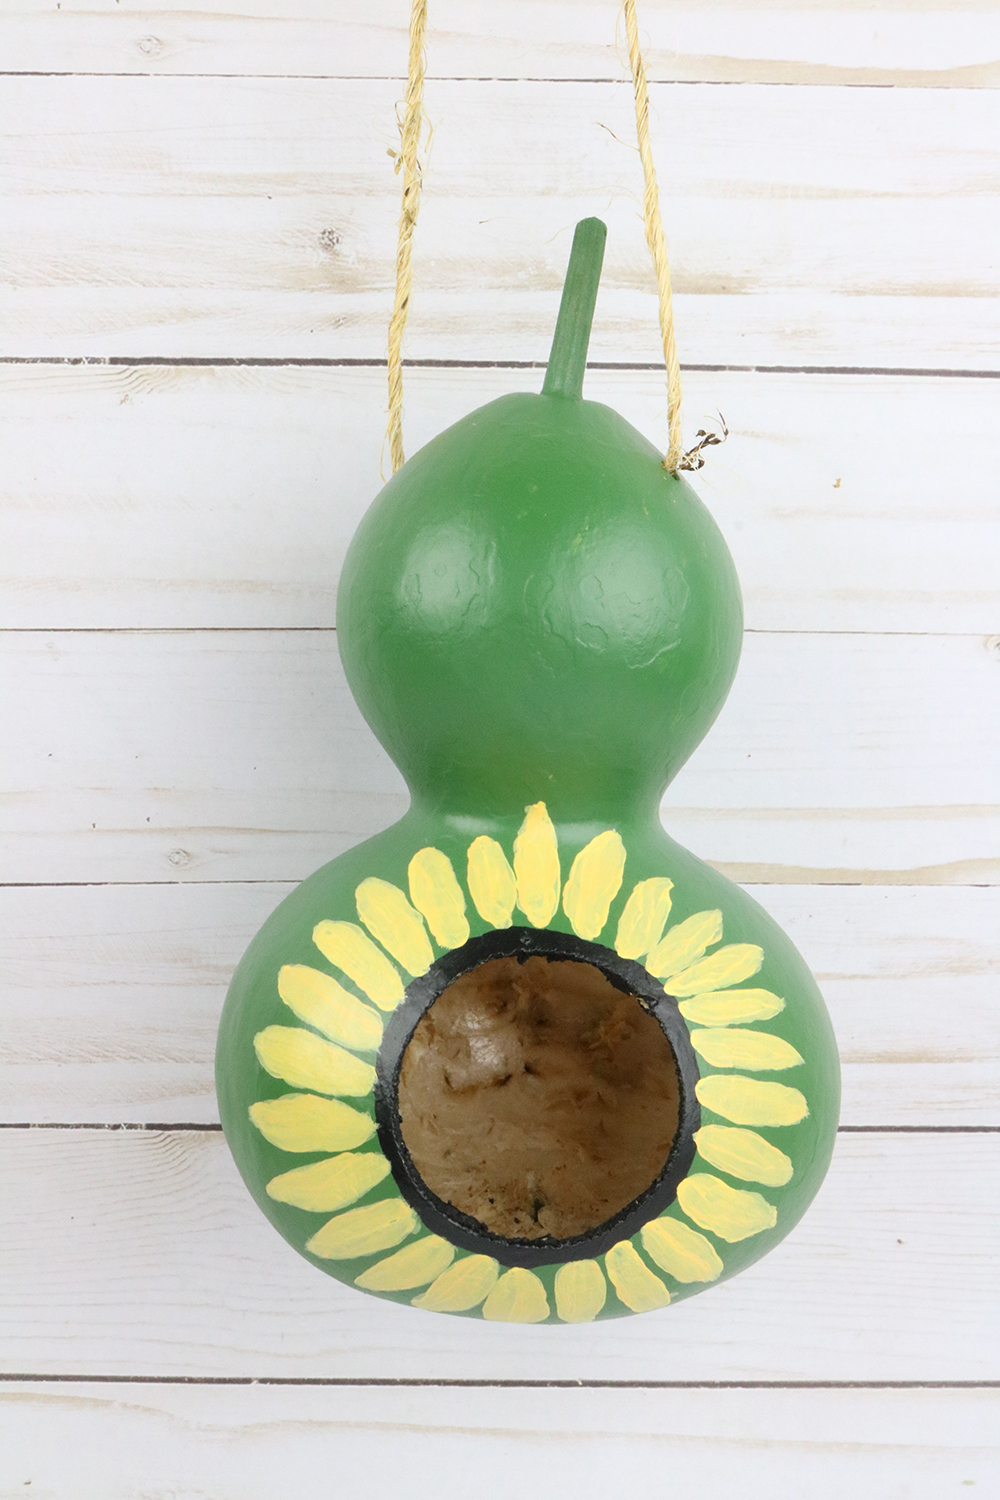
Step 3: Using a spade or hole bit, make a hole on the widest side of the gourd (about 1 to 2 inches from the bottom. The hole will be the ‘opening’ of your bird house.
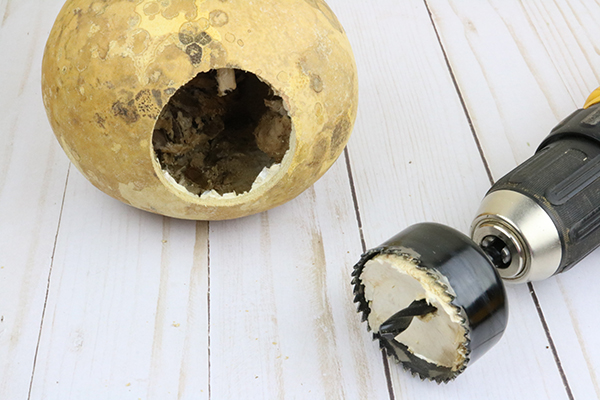
Step 4: Remove all seeds inside the gourd. You can do this by shaking them out of the hole or using pliers.
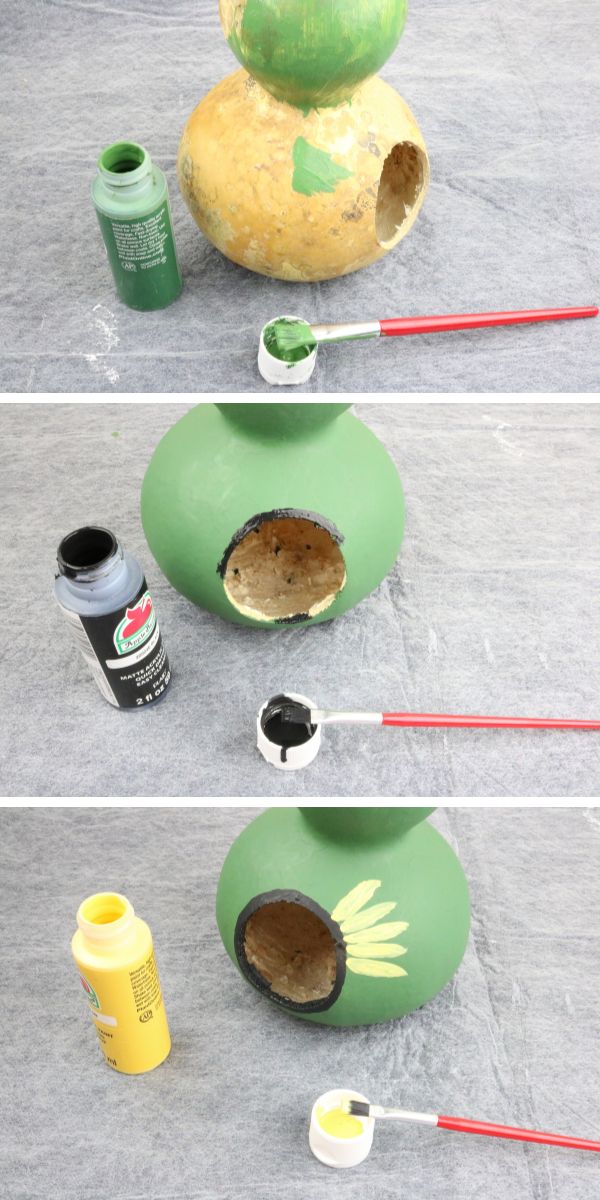
Step 5: If you desire, you can paint the gourd or leave it natural. The sky is the limit with your creativity, making this a great painting project for kids!
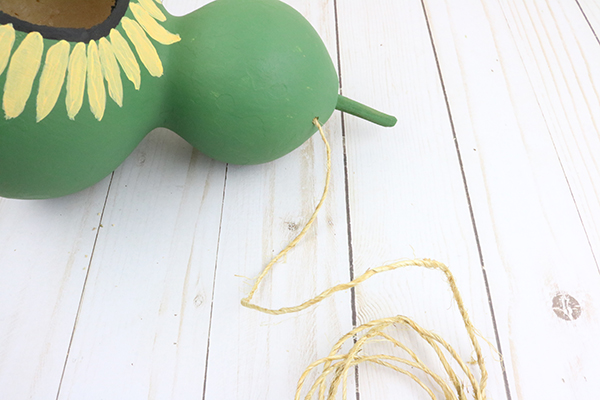
Step 6: once the paint has finished drying, place the twine in the holes and tie a knot to create the hanger for your birdhouse.
Step 7: To make sure your birdhouse lasts, make sure to seal it with a sealer. Lightly spray the sealer with the first coat and allow it to dry (for drying times, look at the directions of your preferred sealer).
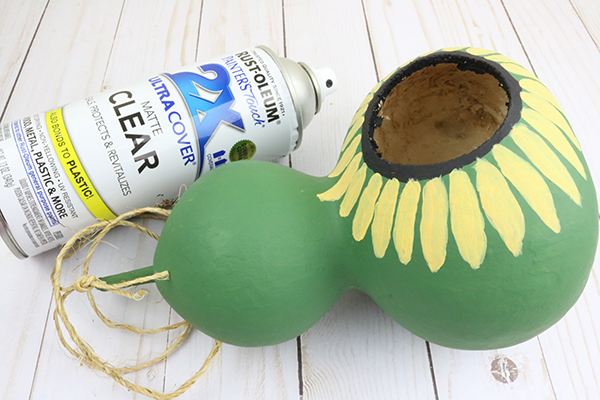
Step 8: Apply a second coat of sealer to your birdhouse. Allow to dry thoroughly per sealer instructions.
Step 9: Once dry, hang your gourd birdhouse in your desired location. Place a few seeds inside to attract birds.
Notes
Note 1: If you grow your own gourds, make sure to let it dry for 3-4 months in a cool place before starting this project.
Note 2: While you may gently wash the outside before starting, do not soak it.
Find it online: https://www.budgetearth.com/gourd-birdhouse/